Today at work, I printed a spaceship!
One of the best things about my job is that I’m surrounded by tremendously smart engineers that fully appreciate the benefits of geeking out. Over the history of our small start-up, my colleagues have brought all manner of their creations into the office including home-built telepresence robots, processor-controlled Christmas decorations and a homemade quad-copter drone that was so good that it was able to crash into a tree way over on the far side of the parking lot.
But this week, we were the kings of Nerdville when Steve brought his new 3D printer in for all of us to play with.
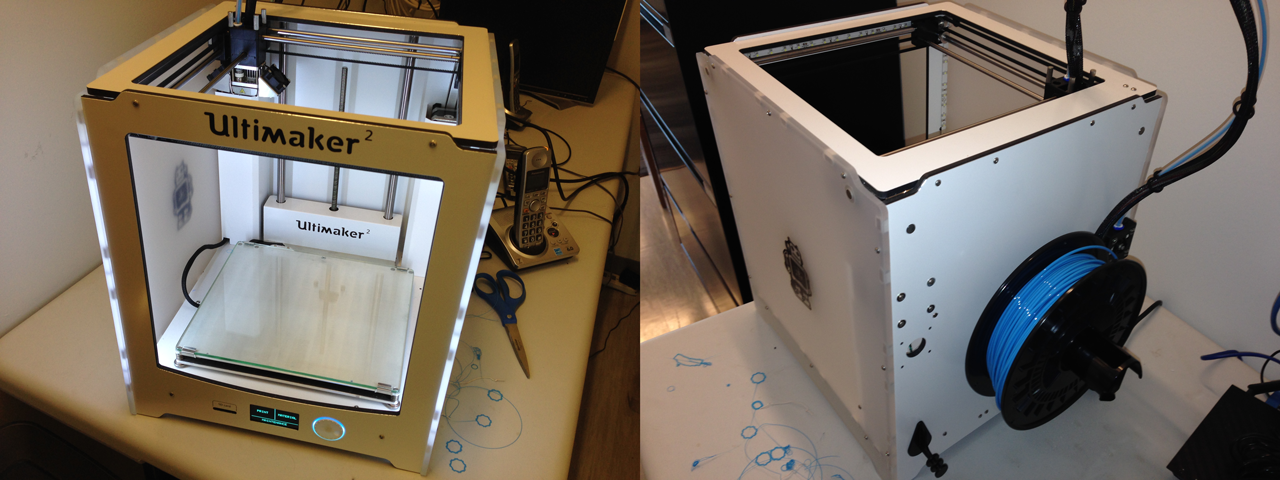
The Ultimaker 2 is a fine-looking machine and considered by many to be the best consumer-level 3D printer available today. 3D printers work by squirting out a stream of hot plastic from a 2-axis print head to make a thin later of material, much like a standard printer. Above you can see the blue plastic wire material that is fed to the print head from a spool on the back of the printer.
The 3D part happens once the first layer of plastic is laid down and the print head starts printing the next layer on top of it. Over the course of a print, the floor of the printer moves slowly downward and the many thin layers of hot printed plastic build up to form a 3D object.
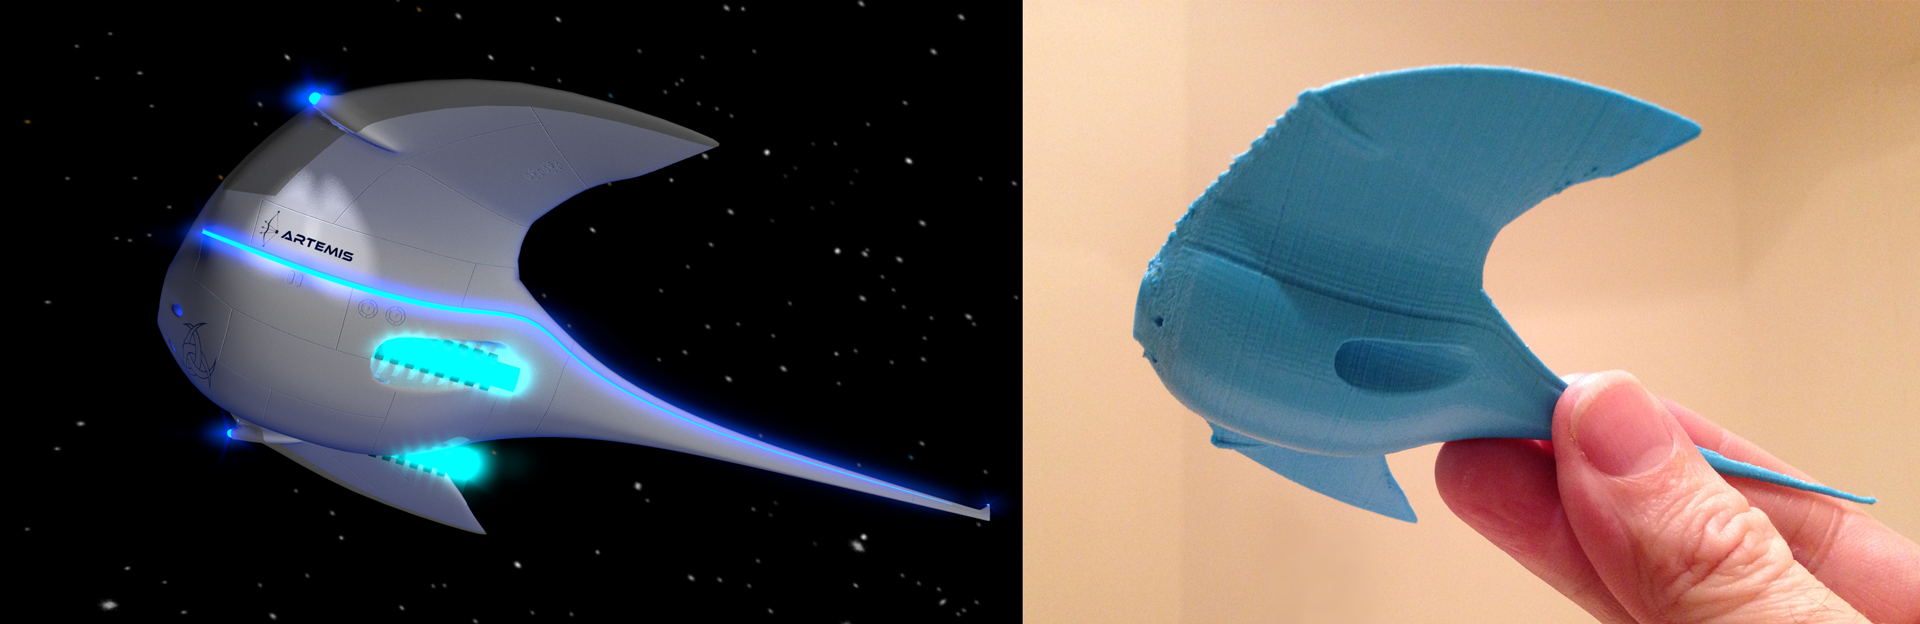
The model I used for the print was the spaceship design we had created for Sector 42, the sci-fi movie Ken and I made with our daughters.
Up until now, the ship had only ever existed inside a computer but today, we would turn our creation into a physical object we could hold in our hands.
Preparing to Print
In order to print the Artemis, the computer model had to leave the glamorous world of motion pictures and get ready for the real world.
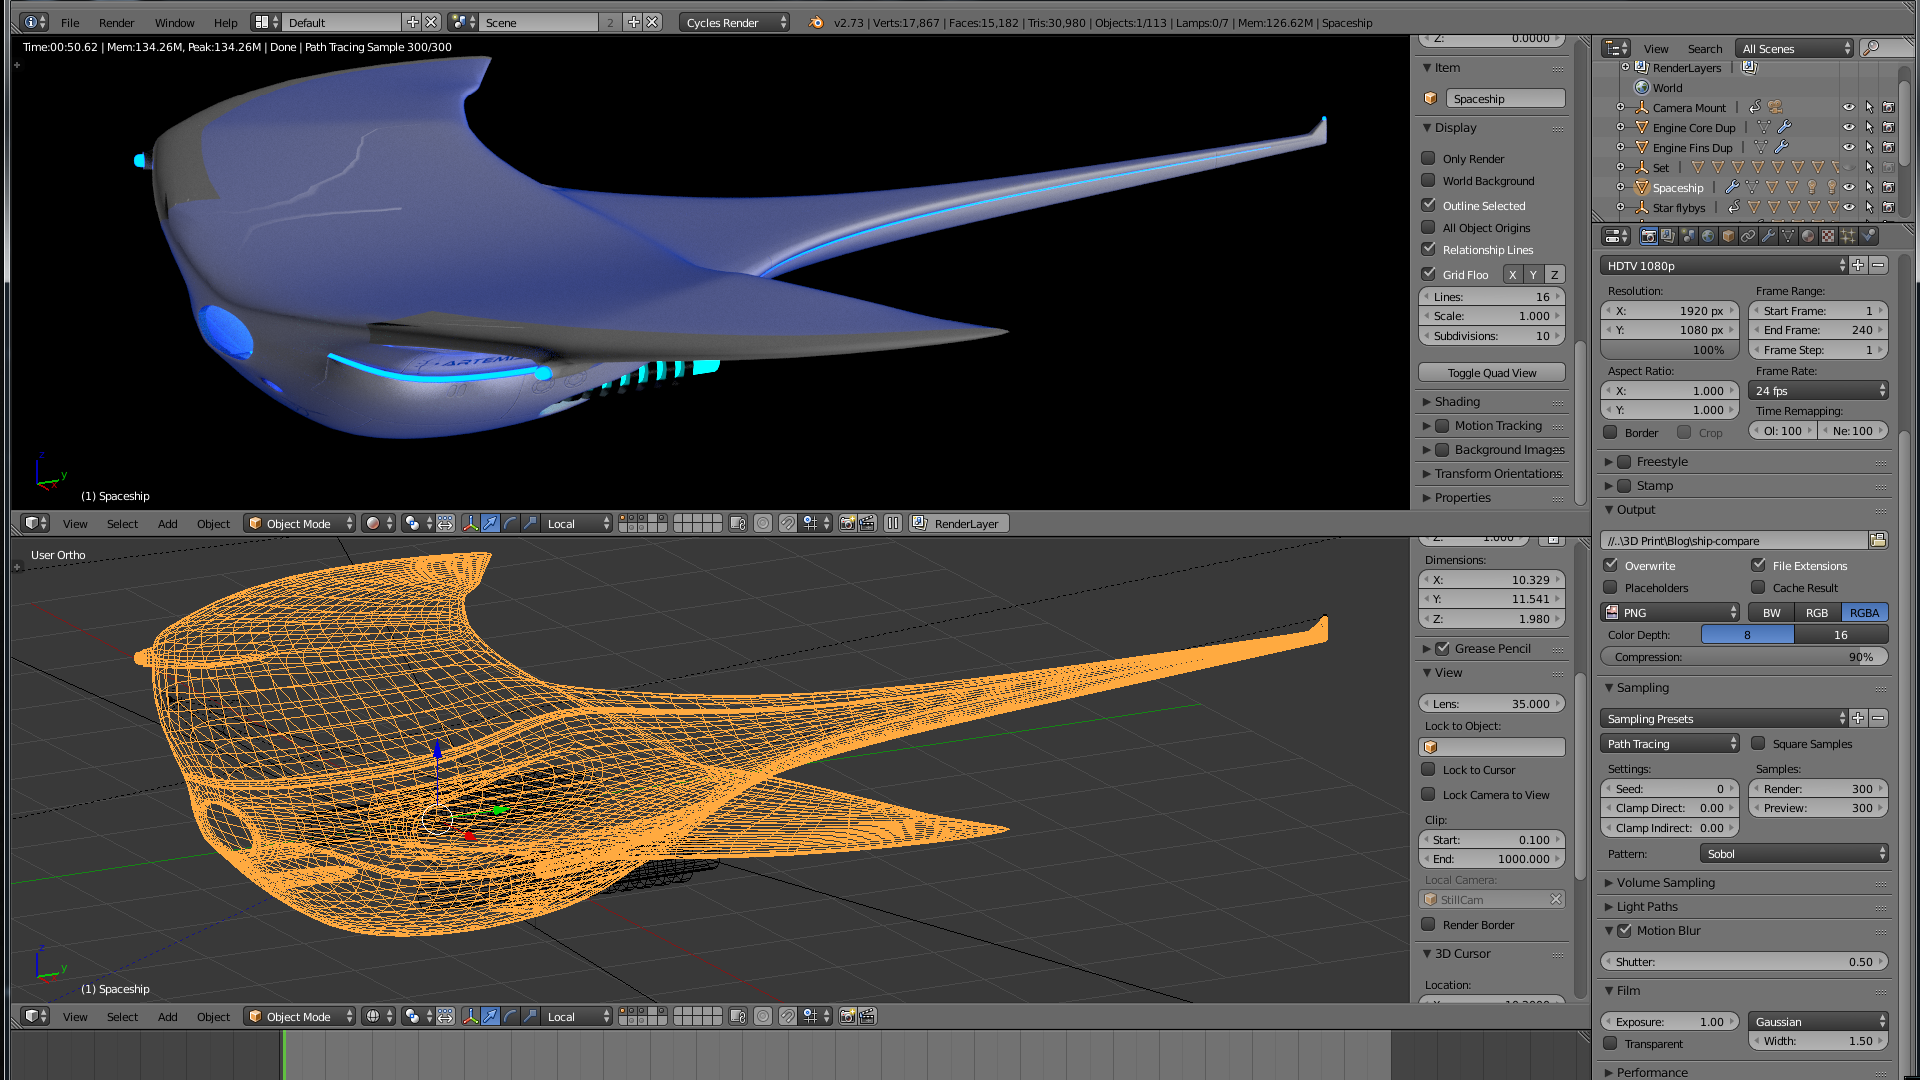
After I’d stripped the virtual model of paint, lights, engines and attached cameras, I closed the various holes in the hull where the engines sat and the bridge window poked through the font. Once completed, I had a 2-dimensional “watertight” manifold, as required by the printing software.
The computer model then moves from my original creation and photography software into the print preparation software that prepares the model for 3D manufacturing. This program cuts the model into tiny slices and maps the print head path over them. It also estimates the distributed weight of the material and creates an internal honeycomb of structural support inside the outer “shell”. as well as any external support structures that may be needed.
We decided that the Artemis should be oriented head-down to better distribute its mass, which required the ship to balance on its nose while being printed.
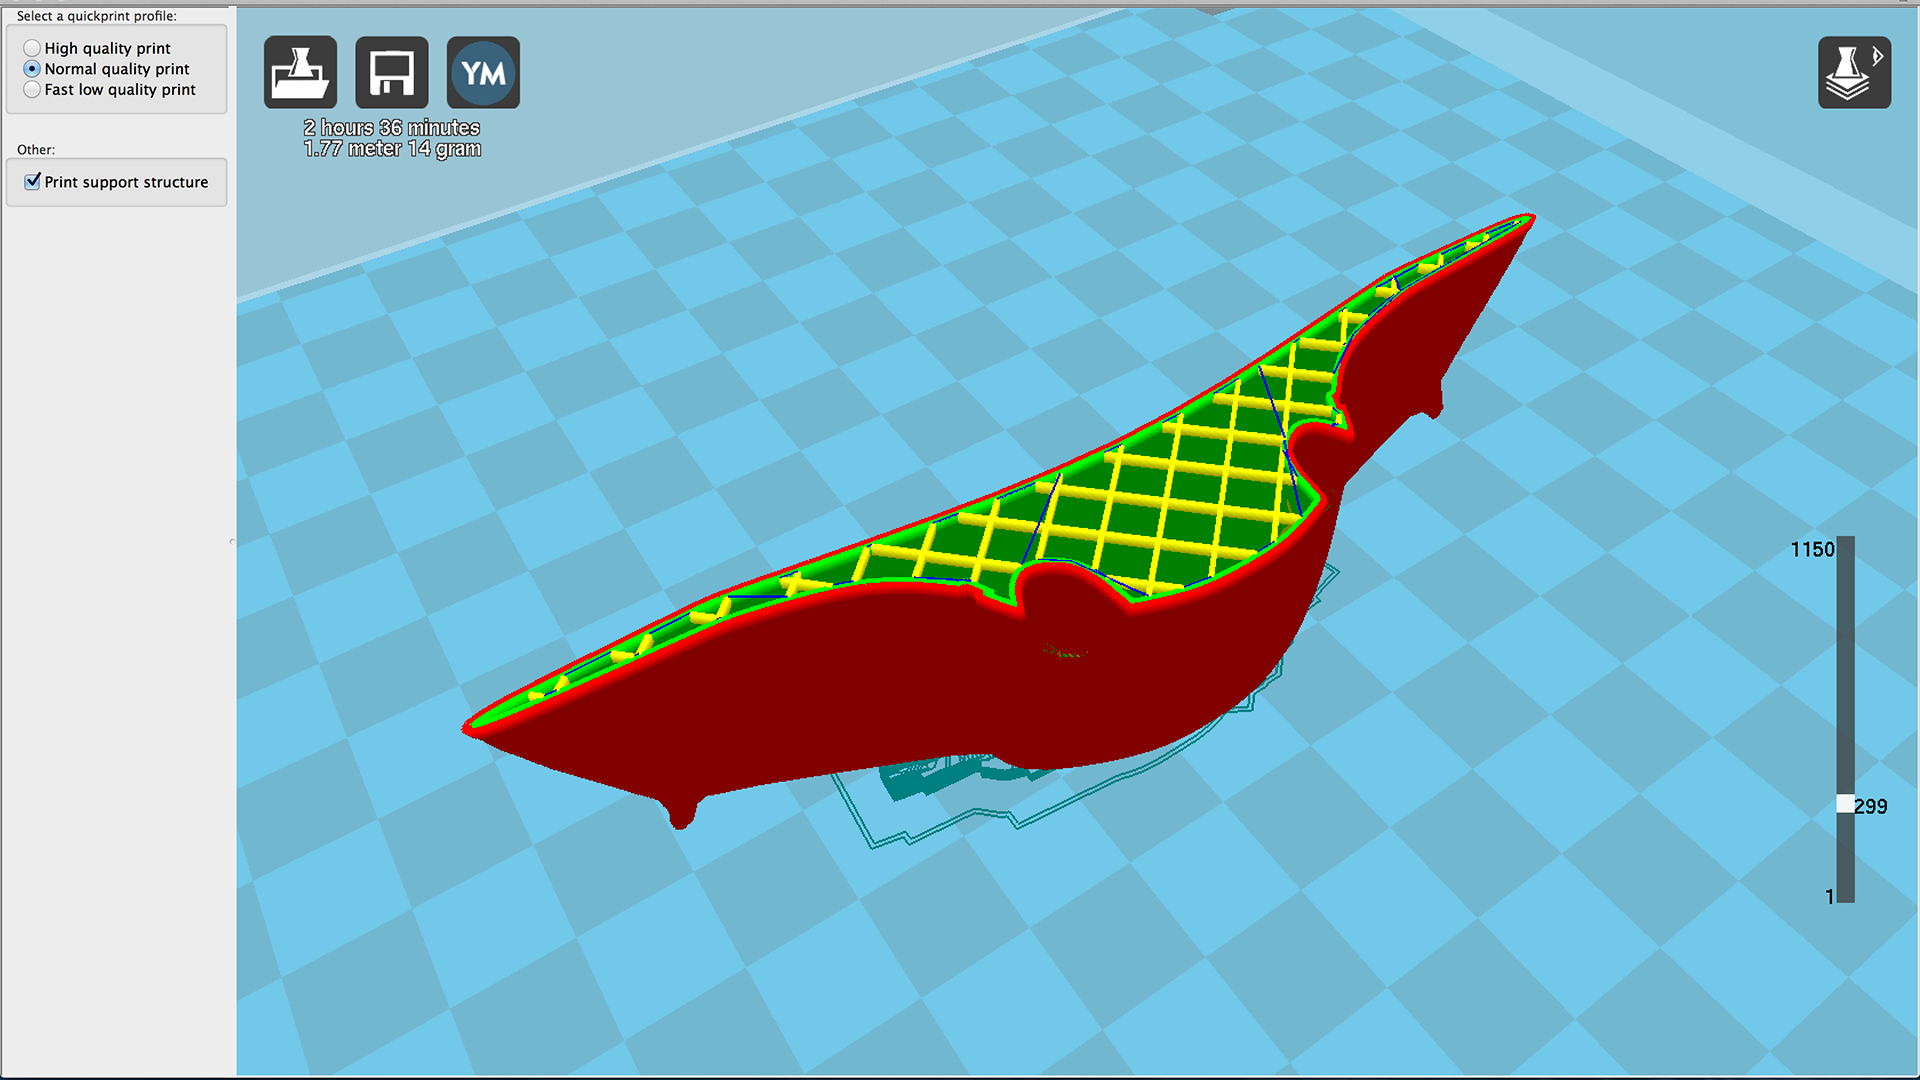
In the above image from the printing prep software, you can see a single slice of the print plan showing the internal support honeycomb in yellow, the path of the print head in dark blue and the tiny aqua-colored external support structure at the bottom that kept the whole thing from tipping over during printing.
Printing
Once the software had generated the plan, it estimated that the final print would take two hours and thirty-six minutes to print. When completed, it would be 12cm long and 14 grams in mass and my children would be delighted.
In the 2-minute video above, you’ll see a time-lapse of the the two prints we made of the Artemis.