My friend at work, who goes by “thejbo”, is the guy who builds and maintains all the servers that host our company web application. He’s moving to Florida to work remotely and I made this motion graphic to commemorate his leaving the office. Really though, it was an excuse to learn more about After Effects and to work with my daughter Hailey. We had a great time making it!
Several people have asked me what went into creating the composition so I’ll include a quick overview of the various parts here in this post.
Overview and Script
I wrote the script in a quick single draft between two meetings at work. (I’ve learned that when the muse visits you, you should take notes right then and there.) That original script really didn’t change much over the course of the eight weeks of evenings it took to complete the project.
After Effects
The assembly and animation was done in Adobe After Effects but the project relied heavily on three additional creative tools which I’ll outline below.
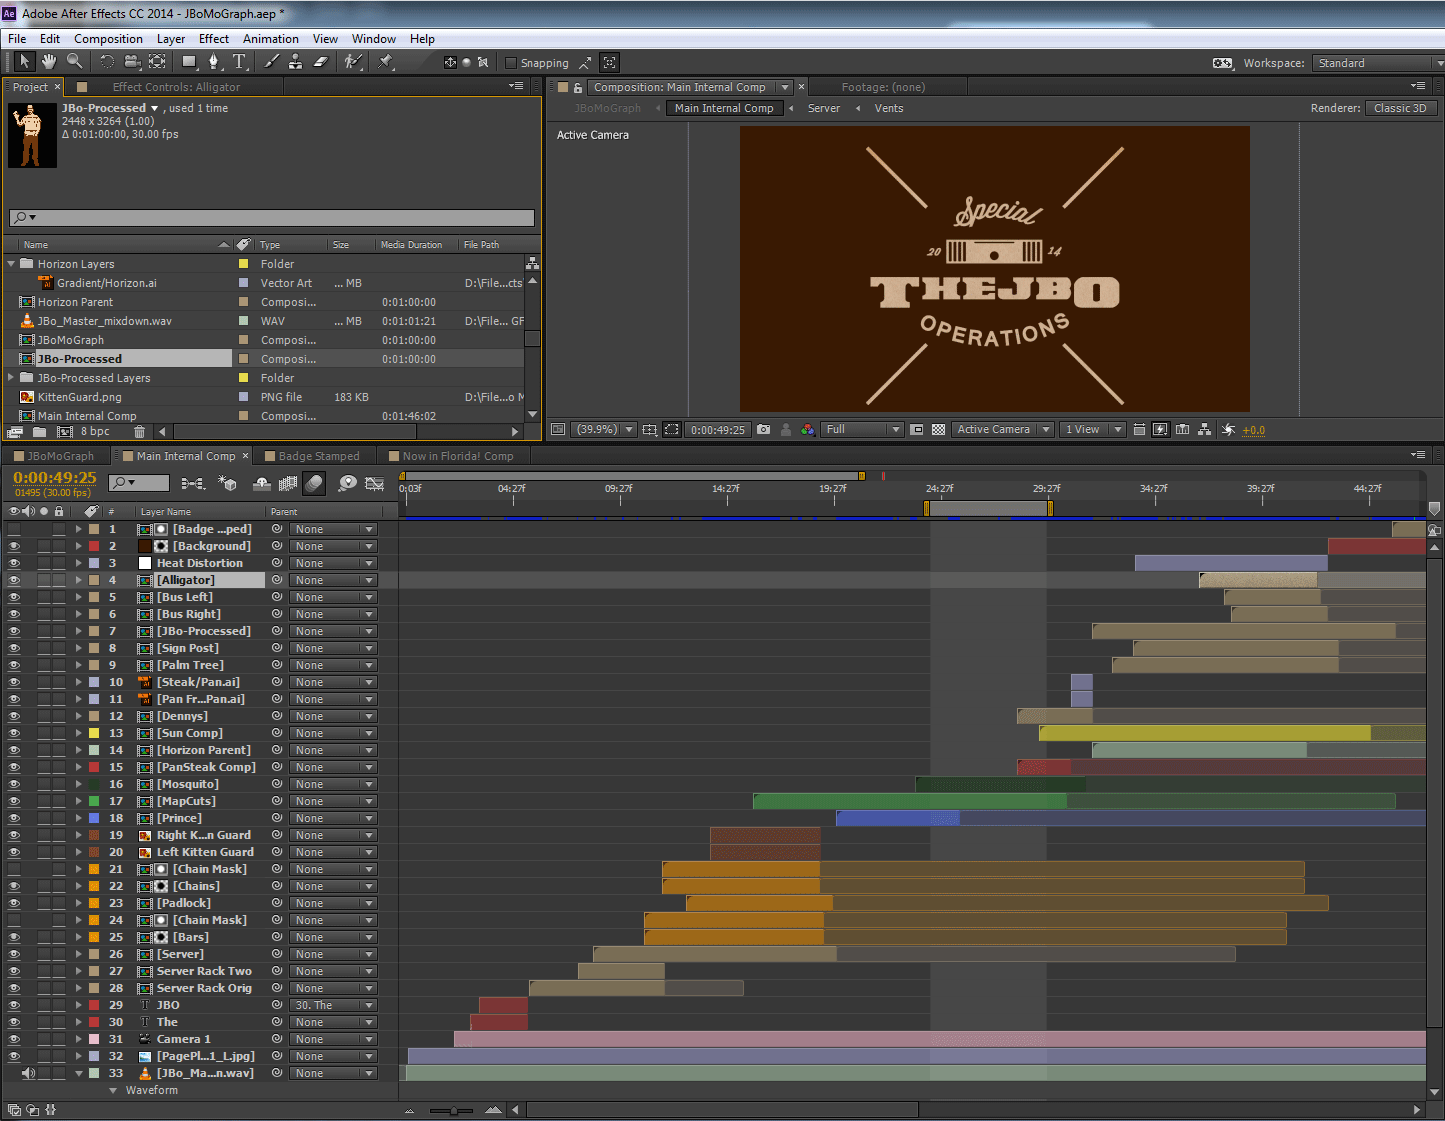
Below you can see the 33 layers that made up the After Effects composition.
The animation is based on a number of techniques I’d recently studied and wanted to try out.
Kinetic Typography — This basic technique of moving the camera around to expose typography opens the animation, but I moved on pretty quickly. After Effects with Mikey provides a great tutorial of text-based motion graphics or “kinetic type” techniques.
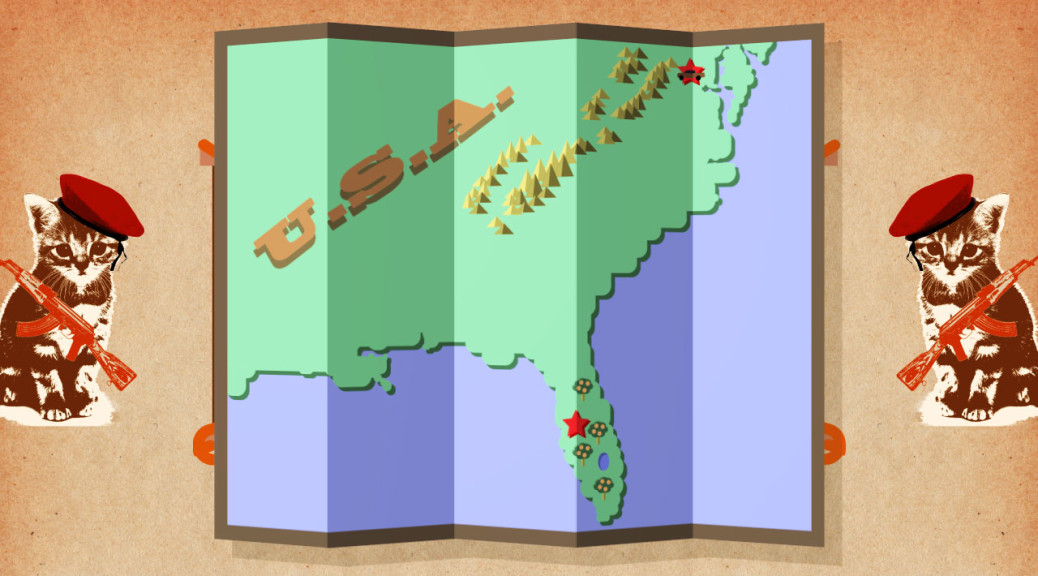
Map Fold Effect — This is a great way to understand After Effects 3D layers, parenting transforms and layer masks. Mt. Mograph presents this technique and is a great source for all kinds of project ideas and utility scripts.
Hipster Badge — The animated “hipster badge” at the end of the video is another technique I got from Mt. Mograph and also used in my recent Hipster Swag Badge motion graphic.
The rest was basically just coming up with animations to match the script. I had built the simple graphics for the “server stacks” sequence from scratch, but soon realized that I was going to need a lot of very specific graphics for the remaining scenes.
Illustrator
Adobe Illustrator was used to create the 18 vector art assets used in the full animation. Because I have neither the talent to create, nor the money to buy professional graphics assets, I simply found watermarked (sample) clip art that I liked and used it as a guide in recreating a simplified vector version in Illustrator. This is probably a “gray area” sort of activity but I figured hey, I wasn’t going to be monetizing it.
Photoshop
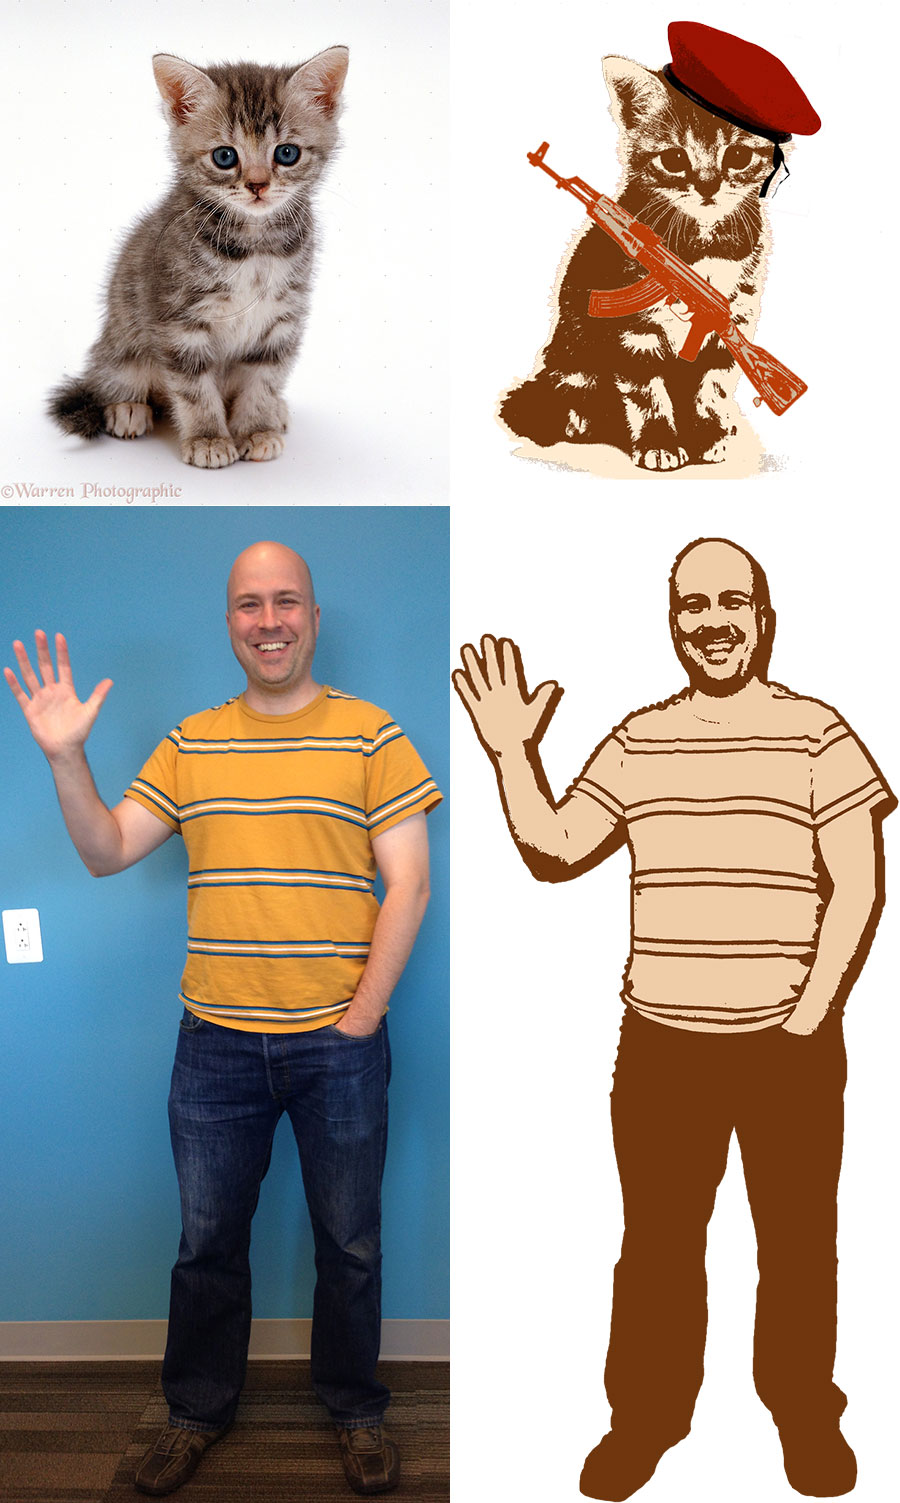
Two of the graphics, the guard kittens and the figure of thejbo, were created in Adobe Photoshop because they were originally photographs. I created the kitten guards from some Google images and thejbo let me take a picture of him that became his waving figure.
Once the image assets were masked, I used a technique I got from Film Riot to create the two-color posterized effect that incorporated the palette colors and helped the photos look more like the surrounding graphics.
Color
Determining the color palettes for each scene and how they fit into the overall composition was perhaps the most fun part of the project. I got to work with my daughter Hailey who provided a lot of input into the final colors sets.
Illustrator has a great tool called Recolor Artwork that will show you all the colors used in a composition and where they sit on the color wheel. Using this, you can play around with color harmonies and adjust color values directly in the artwork simply moving color handles on the wheel. Pretty awesome, actually.
In the images below, you see the master sheet that we used to define all the color palettes in the animation.
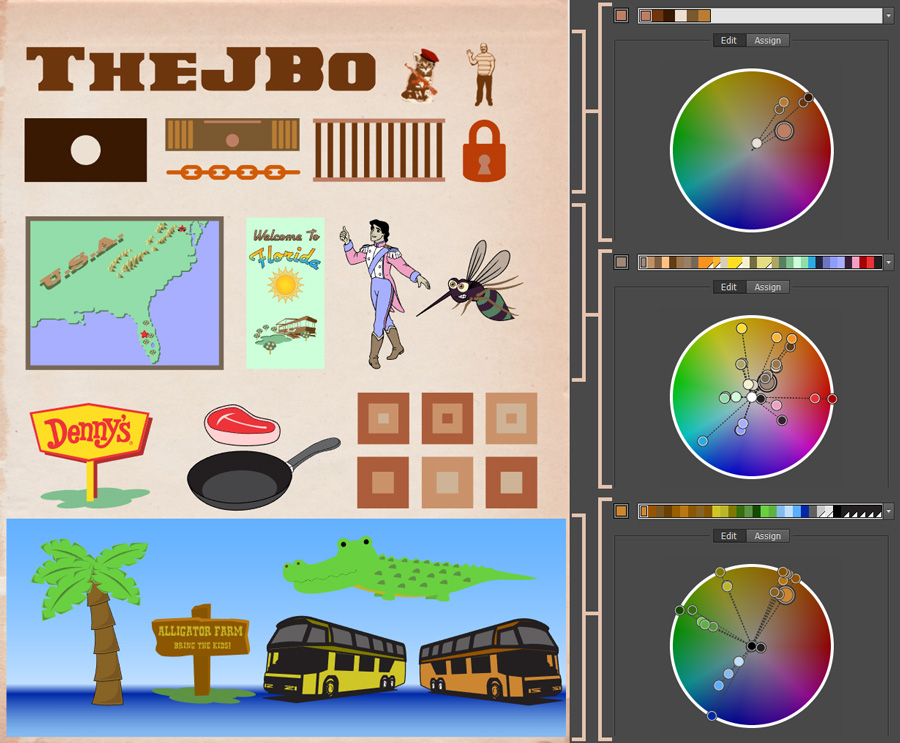
The opening scene uses a very narrow color harmony. In the map scene that comes next, the original palette replaced by a pentagonal harmony that spans the entire color space, to give a feeling of change and expansion.
The palette of the last scene still uses a broad color harmony, but it’s limited to half the color wheel and is a bit darker overall. At the very end, the color elements are removed, leaving the original starting palette.
Audio
The audio was produced in Adobe Audition and incorporated 9 tracks and 30 individual sound elements including drums, bells, whooshes, music and sound samples in addition to the voice-over track.
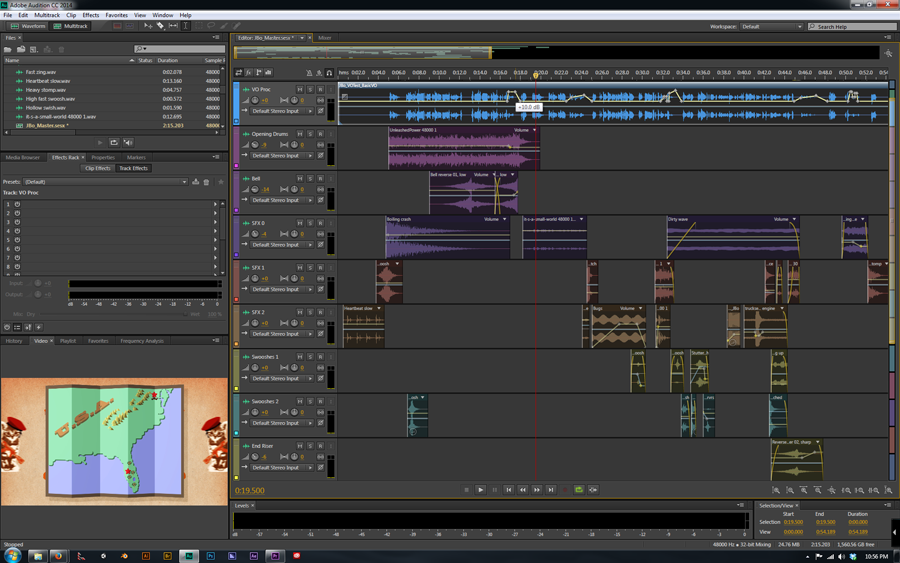
I recorded the voice-over in our spare bedroom with a Zoom H2n audio recorder and then edited together the best of the various takes using Audition. From there, I did some equalization, normalization and compression on the track before adding a 10% pitch reduction and some light reverb.
The sound effects and music were a mix of samples from Video Copilot’s Designer Sound FX as well as sounds and music from license-free sources like Freesound.org.
Using the video from After Effects as a guide, I added and mixed these sound elements to create the final composition.
David and Hailey,
Another wonderful Corboy production…I love the JBO goodbye piece and then learning how hard it was and how many layers went into it, is amazing. You are super! Great job and farewell, JBO, you will not be 4 GOT 10!
Best to all the computer geniuses!
xoxoSally
Fascinating!
Fascinating work. Interesting to learn how really complicated it is & just how much work it was to create.